6.1.4. Using VulcanAI to control TurtleSim
Note
VulcanAI is currently in active development, and new features and improvements are being added regularly. Current version is in Beta stage.
We have already created the necessary tools and main node to control TurtleSim using VulcanAI in the Tools for Turtlesim and VulcanAI Console and manager tutorials.
Now, we will learn how to use these tools to control TurtleSim through the VulcanAI console.
6.1.4.1. Preparing the environment
Before running the console, make sure that the environment is properly set up and that a TurtleSim instance is running. To do so, open a terminal, source the Vulcanexus environment and the workspace where the package was built, and run the following commands:
source /opt/vulcanexus/${VULCANEXUS_DISTRO}/setup.bash && \
source ~/<your_workspace>/install/setup.bash
Remember that if VulcanAI is installed in a virtual environment, you need to activate it before sourcing the workspace. Check the Running VulcanAI from virtual environment with Vulcanexus section for more details.
Now, export your API key for the chosen LLM provider as an environment variable, as it will be needed by VulcanAI to access the LLM service. For example, if you are using OpenAI as provider, run the following command:
export OPENAI_API_KEY="your_api_key_here"
In another terminal, source the Vulcanexus environment and run a TurtleSim instance:
source /opt/vulcanexus/${VULCANEXUS_DISTRO}/setup.bash && \
ros2 run turtlesim turtlesim_node
You should see a window with a turtle in the center of the screen.
6.1.4.2. Run the console
The console can be run directly as a ROS 2 node, as we have installed it as console script in the previous tutorial tutorial. In the terminal where the environment is set up, run the following command:
ros2 run vulcanai_turtlesim_demo vulcanai_turtlesim_demo
You should start seeing VulcanAI logs in the terminal. The first time the console is run, it will download the embedding model used by the library to tokenize the input. After the download is complete, you will see a prompt waiting for your input. You should also see logs indicating the tools that have been registered in the console through the entry point we defined in the previous tutorial. The embedding model download only happens the first time the console is run, so subsequent executions will be much faster.
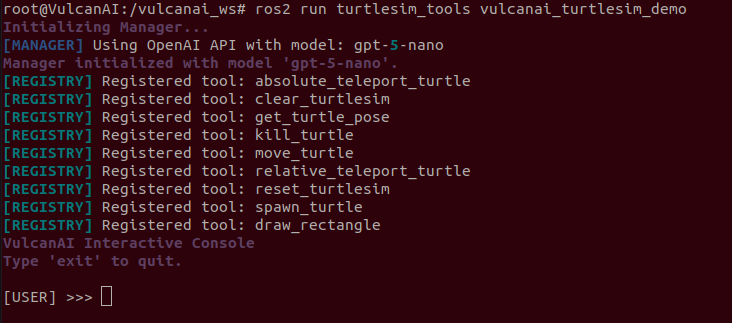
You can also now write the /help command to see the available commands in the console. For example, writing the /tools command will show the tools that have been registered in the console.

6.1.4.3. Start writing prompts
Let’s start testing the console and the created tools by writing a simple prompt to move the turtle forward. Write the following prompt in the console:
[USER] >>> Move the turtle forward by 2 units.
The agent will process the prompt, decide which tool to use, and execute it. You should see the turtle moving forward in the TurtleSim window. The plan generated is shown in the console, along with the tool execution logs.
Note that the LLM was able to deduce that the turtle to be moved is ‘turtle1’. The moving tool fails if the turtle name is not specified, and even though we did not specify the turtle name in the prompt, the LLM was able to deduce it from the context. This can be checked in the input arguments of the tool selected in the plan generated by the agent:
[MANAGER] Plan received:
- Plan Summary: Move turtle1 forward by 2 units along its current heading.

- PlanNode 1: kind=SEQUENCE
    Step 1: move_turtle(name=turtle1, linear=1.0, angular=0.0, duration=2)
Let’s try a slightly more complex prompt:
[USER] >>> Now, draw a complete circular path of radius 2 clockwise.
The agent will generate a plan that involves moving the turtle in a circular path by combining linear and angular movements, deducing again the turtle name from the context.
Before moving to more complex prompts, let’s reset the environment:
[USER] >>> Reset the environment.
In our case, the LLM outputs a sequential plan with two steps, reset the environment and then clear the environment. This is because the LLM has no info about what the actual reset command does, and it does not know that it also clears the environment. This could be easily fixed by improving the tool description to indicate that the reset command also clears the environment, so the LLM does not need to add an extra step to the plan.
6.1.4.4. Writing complex prompts
Although the examples that we have shown so far are useful to test the tools, they are quite simple and do not fully exploit the capabilities of VulcanAI. Let’s try a more complex prompt that involves multiple steps and requires the agent to reason about the sequence of actions to be taken. Reset turtlesim and write the following prompt in the console:
[USER] >>> Draw a pentagon with 'turtle1'.
This action involves not only multiple steps, but also some reasoning to determine the angles and movements required to draw a pentagon shape. Doing this manually would require some calculations and multiple publisher calls, but the LLM is able to deduce the required movements and angles to draw the pentagon shape.
After resetting the environment again, we can try another complex prompt that involves spawning multiple turtles and drawing different shapes at the same time, leveraging the concurrency capabilities of VulcanAI. Write the following prompt in the console:
[USER] >>> Simultaneously, spawn two turtles on coordinates 2,2 and 8,8. Then draw a circle of radius 2 with both turtles but in opposite directions.
Similarly, this action involves advanced reasoning to determine the sequence of actions and the concurrency required to draw the shapes at the same time. This example also showcases the ability of VulcanAI to handle parallel tasks when a plan involves multiple independent actions.